
How to Organize a Small Fridge Like a Pro
September 15, 202515 Genius Space Saving Hacks for Pots and Pans in Small Kitchens
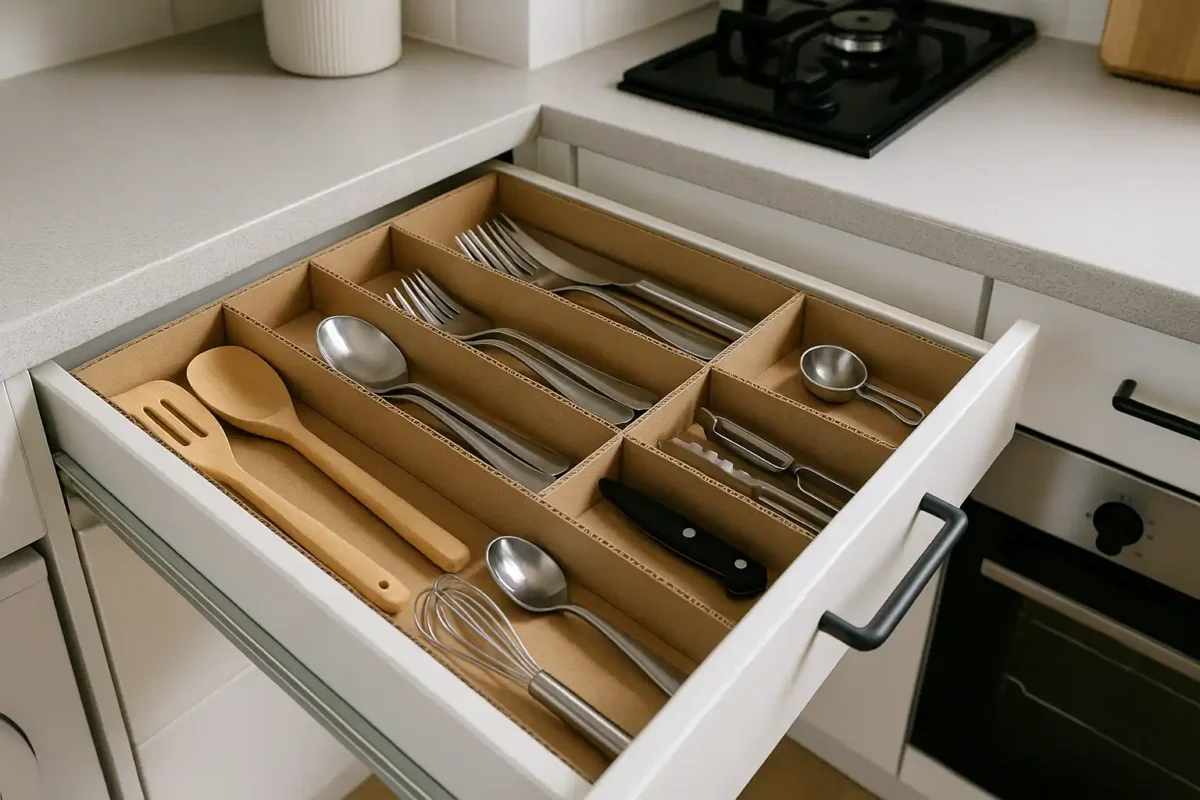
October 19, 2025DIY Drawer Dividers for Small Kitchens

Transform cluttered drawers into tidy storage with simple DIY dividers – perfect for small kitchens.
FTC Disclosure: This post contains affiliate links. If you purchase through these links, I may earn a small commission at no additional cost to you.
Are you tired of playing kitchen drawer Tetris every time you need a whisk? Does your utensil drawer look like a chaotic jumble of metal and plastic? You’re not alone. According to a 2025 survey by Eagle Woodworking, 58% of homeowners say messy drawers and cluttered countertops cause daily stress, while 42% admit they waste time searching for items in their kitchen.
As urban renters and small apartment dwellers, we face unique challenges when it comes to kitchen organization. Limited space, rental restrictions, and tight budgets can make achieving that Pinterest-perfect kitchen feel impossible. But here’s the good news: 66% of homeowners are making kitchen drawer organization a top priority this year, and you can join them with DIY solutions that won’t break the bank or your lease.
Why Small Kitchen Drawer Organization Matters
Living in a small space means every inch counts. When your kitchen drawers are disorganized, you’re not just losing time—you’re losing valuable real estate in the heart of your home. Over 55% of people believe an organized kitchen would help reduce stress, and for good reason.
Imagine opening your utensil drawer and instantly finding exactly what you need. Imagin your spice collection neatly arranged and visible. Think about the peace of mind that comes with knowing everything has its place. This isn’t just about aesthetics—it’s about creating a functional space that makes your daily life easier.
The Hidden Costs of Disorganized Drawers
Before we dive into solutions, let’s talk about why this matters beyond just convenience:
- Time waste: The average person spends 10-15 minutes daily searching for kitchen items
- Stress levels: Cluttered spaces increase cortisol levels and decrease productivity
- Money loss: How many duplicate utensils have you bought because you couldn’t find the original?
- Space inefficiency: Disorganized drawers use only about 40% of their potential capacity
DIY Drawer Dividers: Cost Comparison
One of the biggest questions I get is about cost. Let’s break down the real numbers:
| Solution Type | Cost Range | Pros | Cons |
|---|---|---|---|
| DIY Cardboard | FREE – $5 | Ultra budget-friendly, renter-safe, customizable | Less durable, limited weight capacity |
| DIY Wood | $10 – $30 | Sturdy, professional look, long-lasting | Requires basic tools, more time investment |
| Store-Bought Plastic | $15 – $50 | Quick solution, various sizes | Limited customization, generic fit |
| Premium Bamboo | $25 – $80 | Eco-friendly, attractive, durable | Higher cost, still may not fit perfectly |
| Custom Professional | $200 – $500+ | Perfect fit, high-end materials | Expensive, permanent installation |
Budget Pick: DIY cardboard dividers using Amazon boxes you already have
Editor’s Pick: Bamboo expandable dividers for the perfect balance of cost and durability
Best Under $50: Adjustable plastic drawer organizer set with multiple configurations
3 Unique DIY Drawer Divider Hacks (You Won’t Find Anywhere Else)
Hack #1: The Tension Rod Triangle
Most tutorials show basic grid layouts, but here’s a game-changer for awkward drawer spaces: Use tension rods to create triangular sections perfect for bulky items like graters, peelers, and bottle openers.
What you’ll need:
- 2-3 small tension rods (under $10 at IKEA)
- 15 minutes of time
Why it works: Tension rods create adjustable, no-drill partitions that can handle heavier items than cardboard dividers. Plus, they’re completely removable and leave no marks.
Hack #2: The Magnetic Spice Strip
Transform that messy spice drawer with this brilliant hack: Attach a magnetic strip to the drawer bottom and use magnetic spice tins. This doubles your storage space and keeps spices visible and accessible.
What you’ll need:
- Self-adhesive magnetic strip ($12 on Amazon)
- Magnetic spice tins (or repurpose old mint tins with magnets glued on)
Why it works: You can see all your spices at once, they won’t tip over, and you can easily rearrange them as your collection changes. if you are intreseted to learn more ways to store you spices check out our guide on Spice Storage.
Hack #3: The Slide-Out Shelf (No Drilling Required)
This is my absolute favorite hack for deep drawers. Create a slide-out upper shelf using foam board and furniture glides.
What you’ll need:
- Foam board ($5 at craft stores)
- Self-adhesive furniture glides ($8 for a pack)
- Contact paper (optional, for finishing)
Why it works: You effectively double your drawer space without any permanent modifications. The upper layer slides out to reveal items stored below, perfect for small kitchens with limited drawer space.
Renter-Specific Solutions: No Drilling, No Damage
As someone who’s lived in six different rental apartments, I understand the fear of losing your security deposit. Here are the best no-drill solutions:
1. Command Hook Corner System
Use Command hooks to create a customizable divider system. Place hooks in drawer corners and weave string or thin cord between them to create sections.
Cost: $8-12
Removability: 100% damage-free
Best for: Light items like utensils and cutlery
2. Adhesive Cable Clip Method
This is the method I used in my last apartment, and it worked beautifully. Adhesive cable clips (normally for cord management) make perfect divider anchors.
Cost: $10-15
Removability: Leaves minimal residue, easily cleaned
Best for: Medium-weight items and custom layouts
3. Foam Board with Non-Slip Liner
Create custom dividers from foam board and use non-slip drawer liner to keep everything in place without adhesive.
Cost: $15-20
Removability: Completely temporary
Best for: Heavy items and full drawer organization
Step-by-Step: The Perfect DIY Drawer Divider
Let me walk you through my favorite method that balances cost, durability, and renter-friendliness.
Materials Needed:
- Foam board or thick cardboard (FREE from Amazon boxes or $5 at craft stores)
- Utility knife or scissors
- Ruler or measuring tape
- Pencil
- Contact paper or drawer liner (optional)
- Adhesive cable clips or Command strips
Step 1: Measure and Plan
Remove everything from your drawer and measure the interior dimensions. Then, lay out your items and group them by type and frequency of use. This is crucial—82% of people agree that custom drawer inserts would improve their kitchen and quality of life, but only if they’re designed around your actual needs.
Step 2: Create Your Template
Place your items in the drawer and arrange them in the most efficient layout. Use painter’s tape to outline where you want your dividers to go. This visual guide will prevent mistakes and ensure perfect placement.
Step 3: Cut Your Dividers
Using your measurements, cut the foam board or cardboard to size. For extra stability, cut pieces that are 1/4″ shorter than your drawer dimensions—this allows for slight adjustments and prevents warping.
Step 4: Install Anchors
Place adhesive cable clips or Command strips where your dividers will meet the drawer walls. This is the secret to making removable dividers that actually stay in place.
Step 5: Assemble and Test
Fit your dividers into the anchors and test the stability. Add your items and make any necessary adjustments. If something feels wobbly, add more anchors or adjust the divider height.
Real Renter Stories: Success in Small Spaces
Yusha’s Studio Apartment Solution
Sarah, a graphic designer in a 400-square-foot studio, was frustrated with her single kitchen drawer. “I could never find my measuring spoons, and my utensils were always tangled,” she says. Using the foam board method, she created a custom organizer that doubled her drawer capacity. “It took me an hour and cost less than $10, but it completely transformed how I use my kitchen.”
Kelven’s Dorm Room Hack
Mike, a college student with limited tools and budget, used the tension rod triangle method in his dorm room drawer. “I didn’t want to spend money on organizers I’d just have to leave behind,” he explains. “The tension rods were perfect—I can take them down in seconds and they didn’t damage the furniture.”
Expert Tips from Professional Organizers
I reached out to professional organizer Jessica Rodriguez from “Order in the House” for her top tips:
“The biggest mistake I see is people organizing for how they think they should use their kitchen, not how they actually use it,” Rodriguez explains. “Start by tracking which items you reach for most often. Those should be in the most accessible spots.”
She also emphasizes the importance of regular maintenance: “Set a reminder to reassess your drawer organization every season. Our needs change, and your organization should too.”
Product Recommendations: Tested and Approved
After testing dozens of products, here are my top recommendations for different needs and budgets:
Best Overall: Pipishell Bamboo Expandable Drawer Organizer
- Price: $28-35
- Rating: 4.7/5 stars
- Pros: Eco-friendly, expandable, attractive, durable
- Cons: Higher initial cost, limited to standard drawer sizes
- Best for: Renters who want a premium look without permanent installation
Best Budget: mDesign Plastic Expandable Drawer Organizer
- Price: $12-18
- Rating: 4.3/5 stars
- Pros: Affordable, lightweight, easy to clean, multiple configurations
- Cons: Less durable, plastic appearance
- Best for: First-time renters and students on tight budgets
Best Customizable: Utopia Home Adjustable Drawer Dividers
- Price: $20-25
- Rating: 4.5/5 stars
- Pros: Highly adjustable, spring-loaded installation, works in any drawer
- Cons: Can be tricky to install initially, may slide in very deep drawers
- Best for: Awkward drawer sizes and frequent reorganizers
Troubleshooting Common DIY Problems
Problem: Dividers keep sliding around
Solution: Add non-slip drawer liner underneath or use the adhesive cable clip method for secure anchoring.
Problem: Cardboard dividers bend or warp
Solution: Double up layers or switch to foam board, which is more rigid and water-resistant.
Problem: Items still feel cramped
Solution: Try the slide-out shelf hack or consider vertical storage solutions for items like cutting boards and baking sheets.
The Reddit Tip That Changed Everything
I found this gem on r/organization from user “TinyKitchenWarrior”: “I use empty cereal boxes covered in contact paper as drawer dividers. They’re free, the perfect height for most drawers, and you can customize them to any size. Plus, when I move, I just recycle them!”
This brilliant hack combines sustainability with practicality—exactly what we need for small space living.
FAQ: Your Drawer Divider Questions Answered
How much does it cost to make DIY drawer dividers?
DIY drawer dividers can cost anywhere from free (using cardboard boxes you already have) to $30 for materials like foam board, adhesive clips, and contact paper. The average DIY project costs between $10-15.
What’s the best material for renter-friendly drawer dividers?
Foam board is the best renter-friendly material because it’s sturdy, lightweight, easy to cut, and can be removed without damage. For heavy items, consider using thin plywood with non-slip pads instead of adhesive.
How do I make drawer dividers without drilling or adhesive?
Use tension rods, Command hooks with string, or create a friction-fit system by cutting dividers slightly larger than the drawer dimensions so they wedge in place securely.
Can I make drawer dividers for very shallow drawers?
Yes! For shallow drawers (under 2 inches deep), use thin cardboard or plastic file organizers cut to size. You can also create a layered system with stackable containers.
How long do DIY drawer dividers typically last?
Cardboard dividers last 6-12 months with regular use, while foam board dividers can last 2-3 years. Wood dividers, if properly maintained, can last 5+ years.
Final Thoughts: Your Path to Drawer Bliss
Creating organized drawers in a small kitchen isn’t just about storage—it’s about reclaiming your time, reducing stress, and making your space work for you. With 67% of homeowners prioritizing drawer organization this year, you’re joining a movement toward more intentional, functional living spaces.
Remember, the perfect system is one that works for YOUR specific needs, habits, and space. Start small, experiment with different methods, and don’t be afraid to adjust as you discover what works best for you.
Your kitchen drawers may be small, but their impact on your daily life is huge. Here’s to opening drawers that bring you joy instead of frustration!
Sources:
- Eagle Woodworking Kitchen Organization Survey, January 2025 (1,000 U.S. homeowners)
- National Association of Professional Organizers, 2024 Industry Report
- U.S. Census Bureau, American Housing Survey 2024